Create Object
To create a new object, go through the following 8 steps:
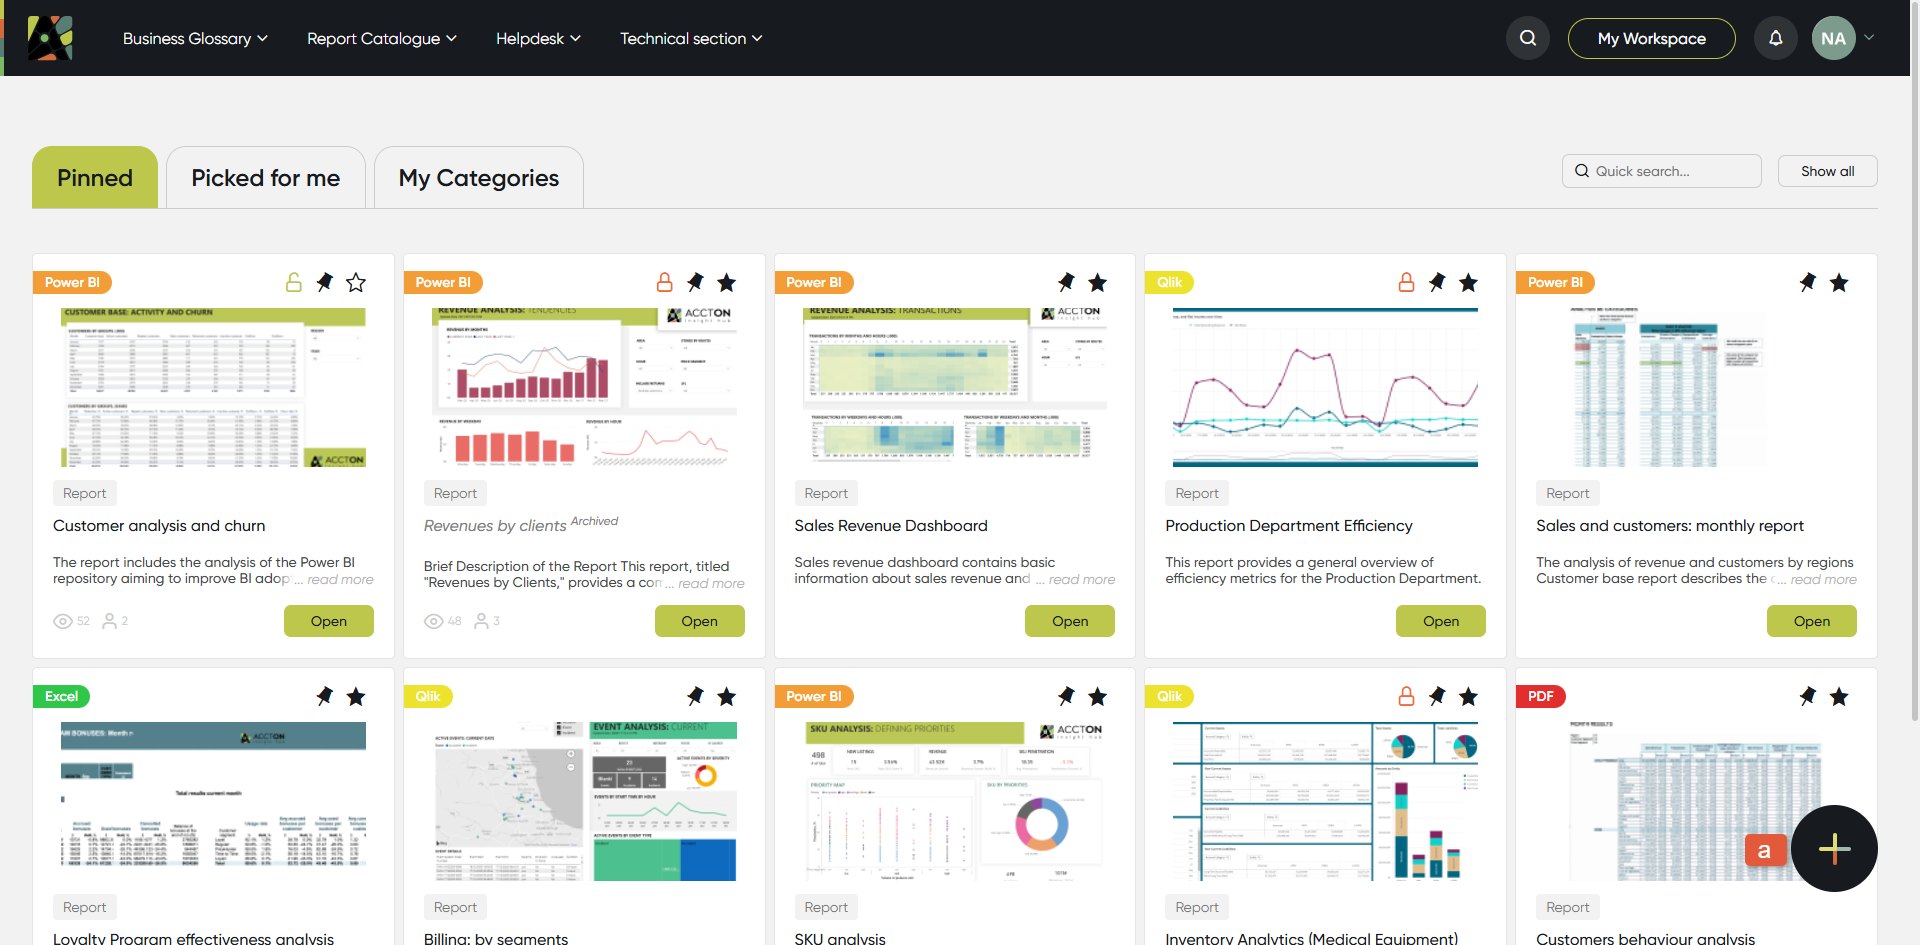
1. Push the 'Create' button
Click "+" button on any screen. (a)
The button is available on all pages.
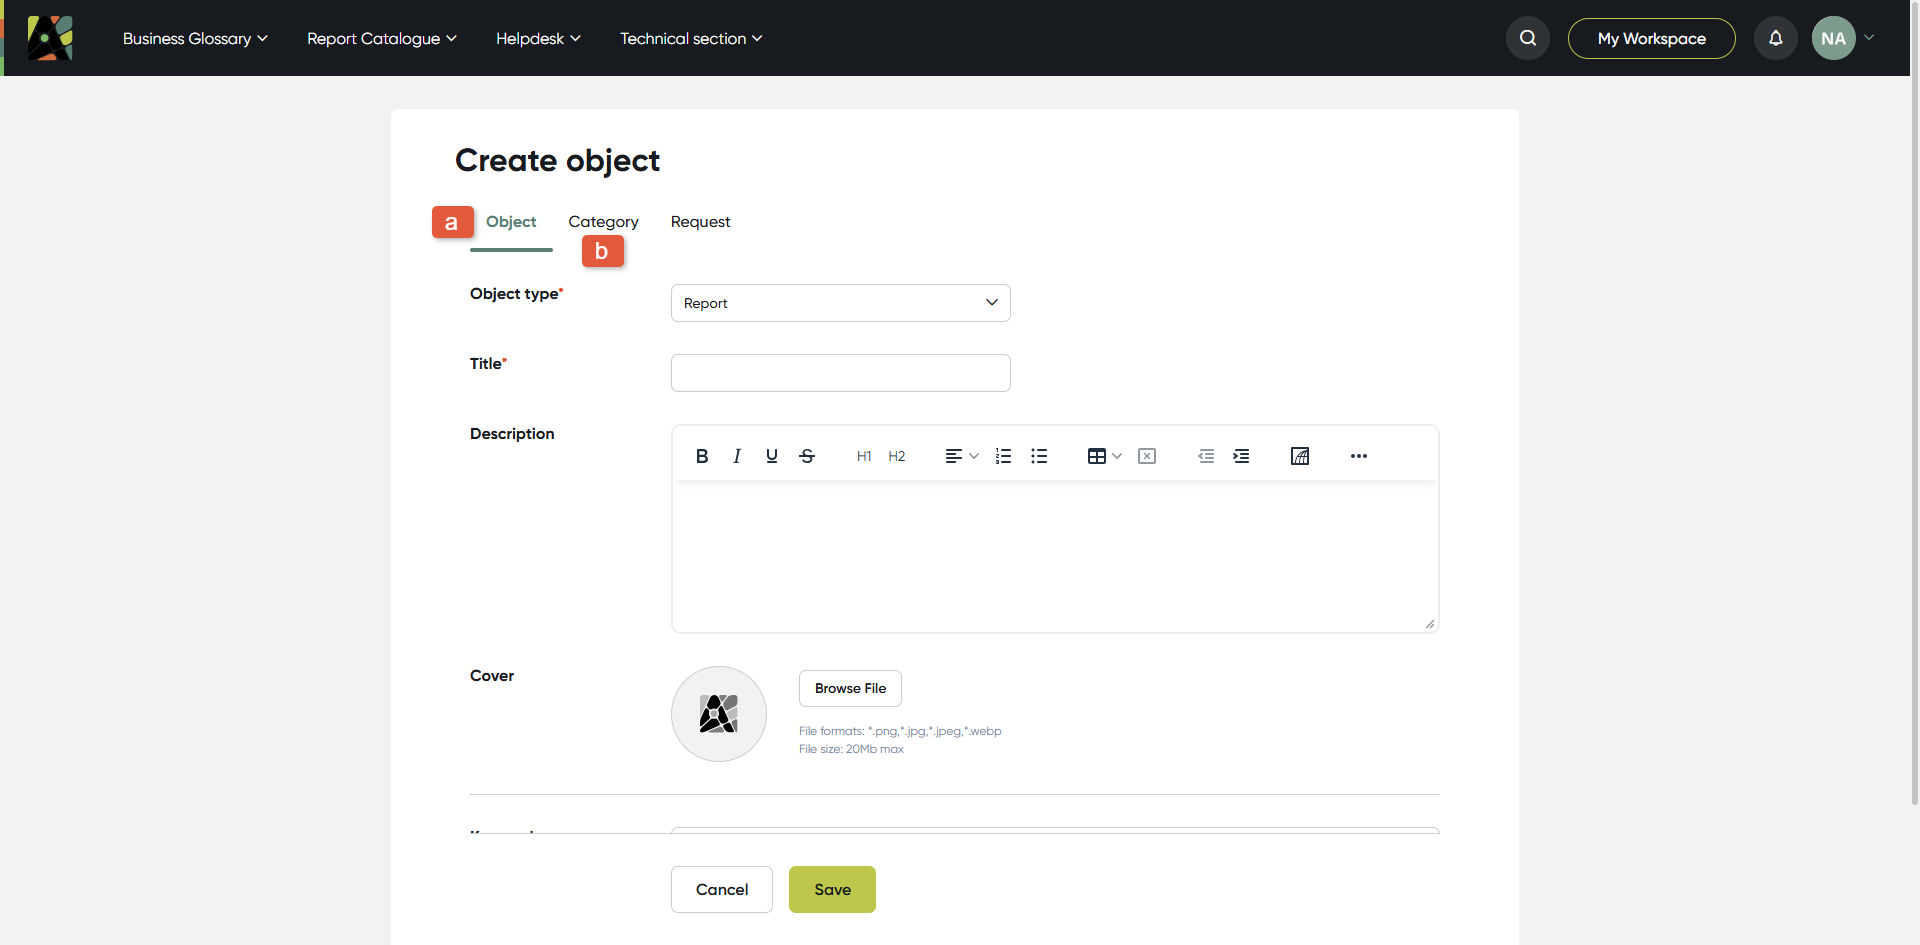
2. Choose an object or category
In a new window select what you want to create:
(a) Object – selected by default
(b) Category – click on the second tab if you want to create a new category
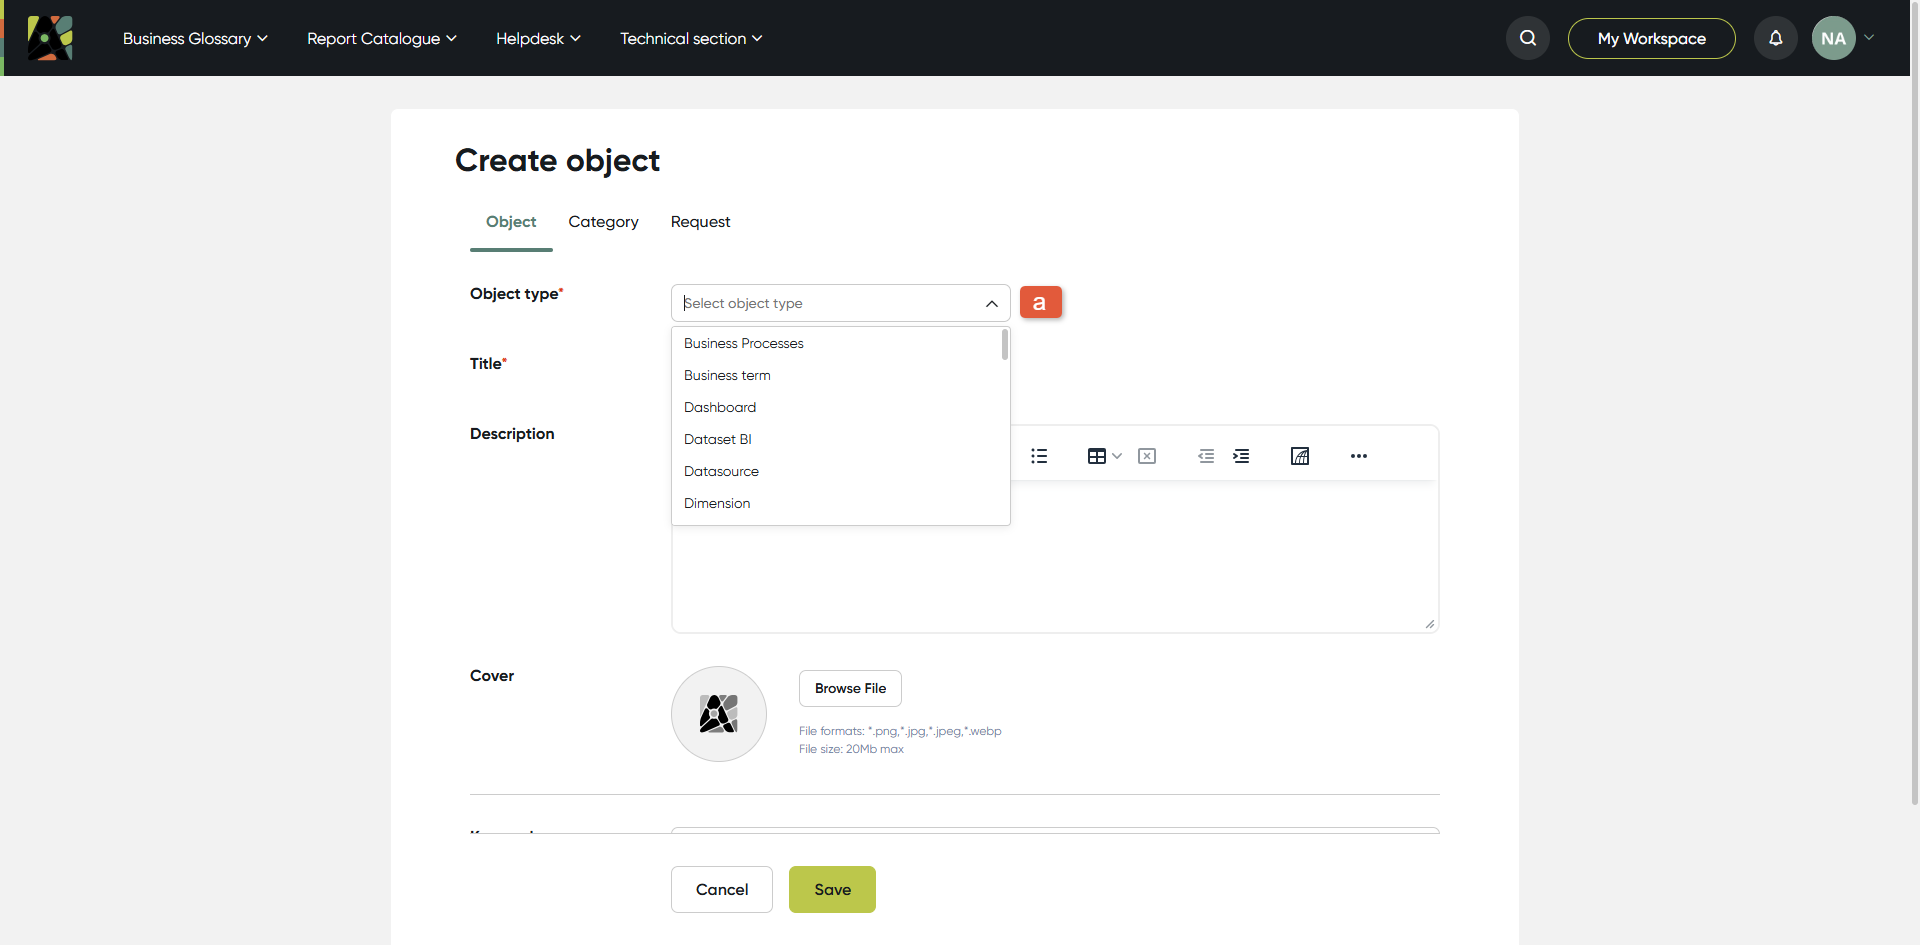
3. Select object type
In the field Object type select an object type you are going to create:
(a) Click the object type field and select the object type from the drop-down menu
4. Attributes
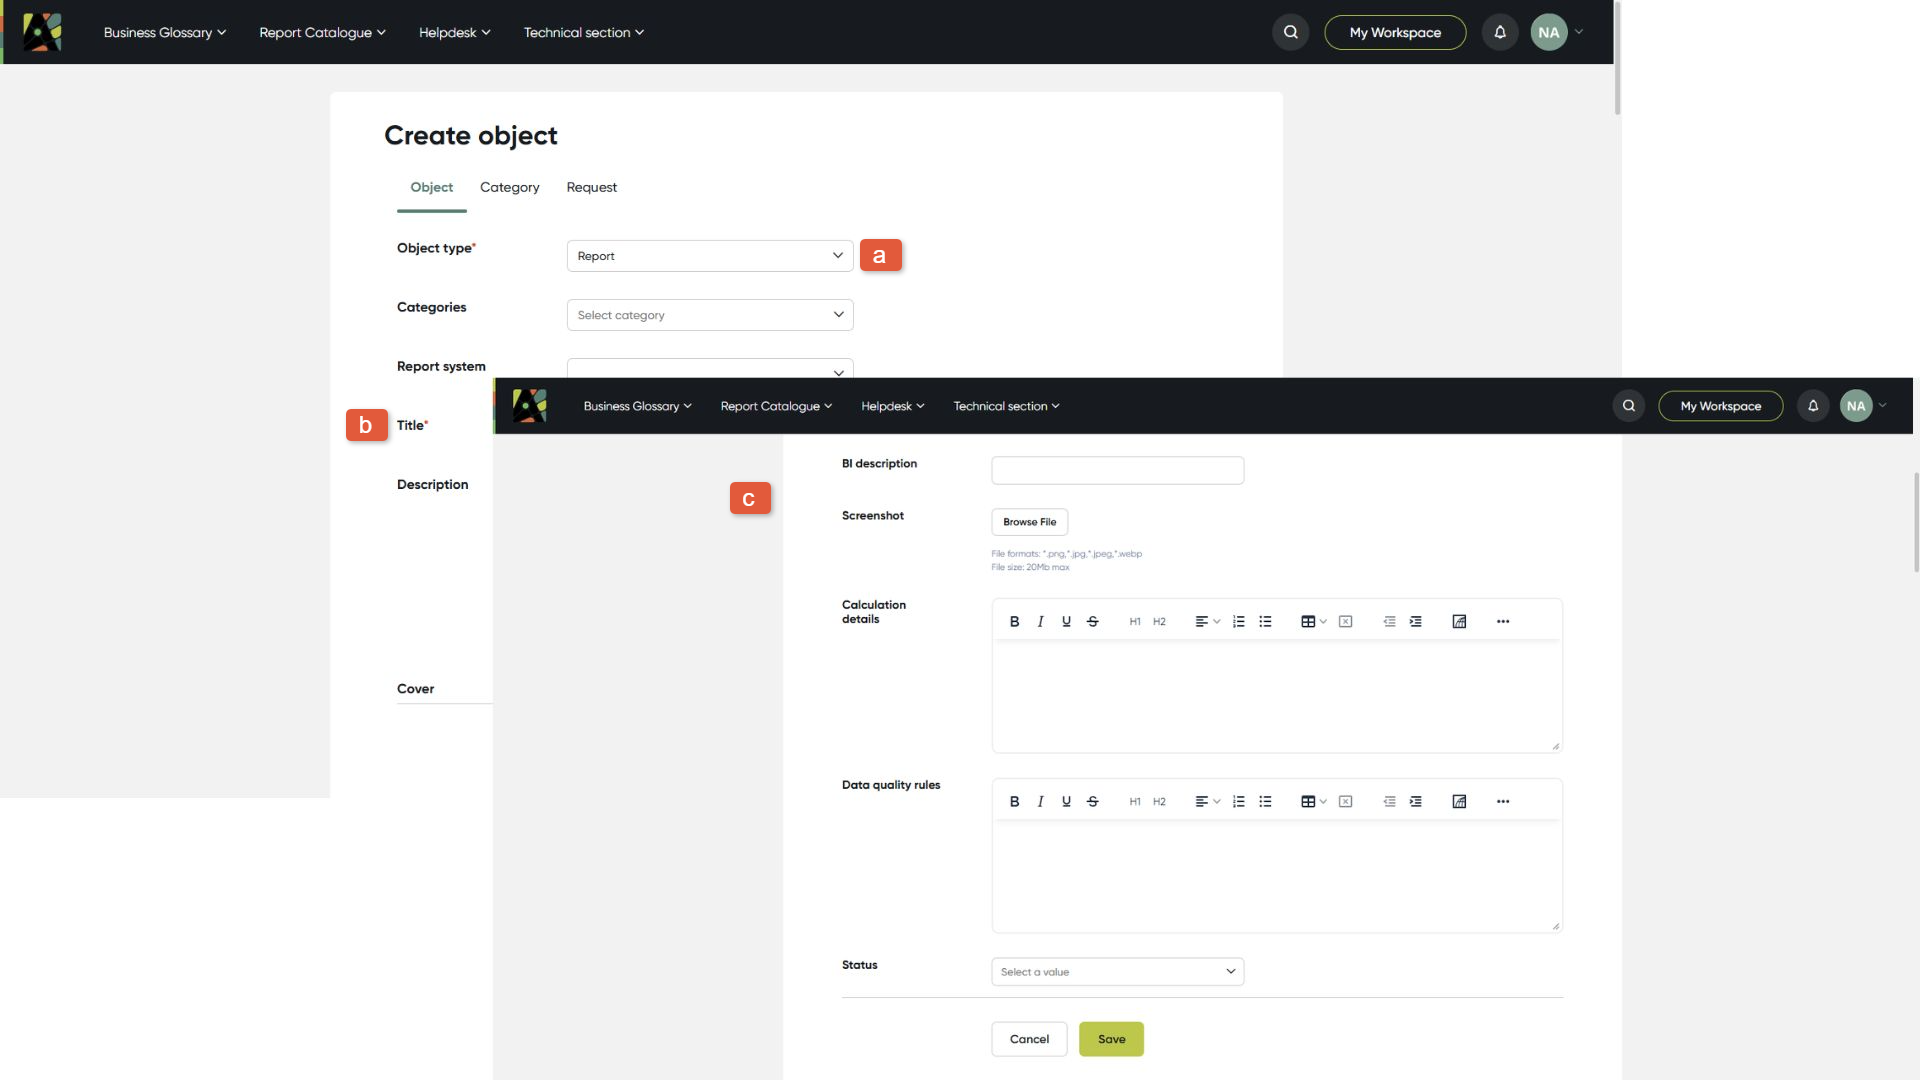
As soon as the object type is selected you can see the relevant set of attributes for this object.
Different attribute types exist in the application (check available attribute types here).
Fill attributes for an object:
(a) Object type you have selected
(b) The required fields are marked with "*", for example, “Name”
(c) Attributes for this object type
5. Relations
Scroll down to see the Relations section.
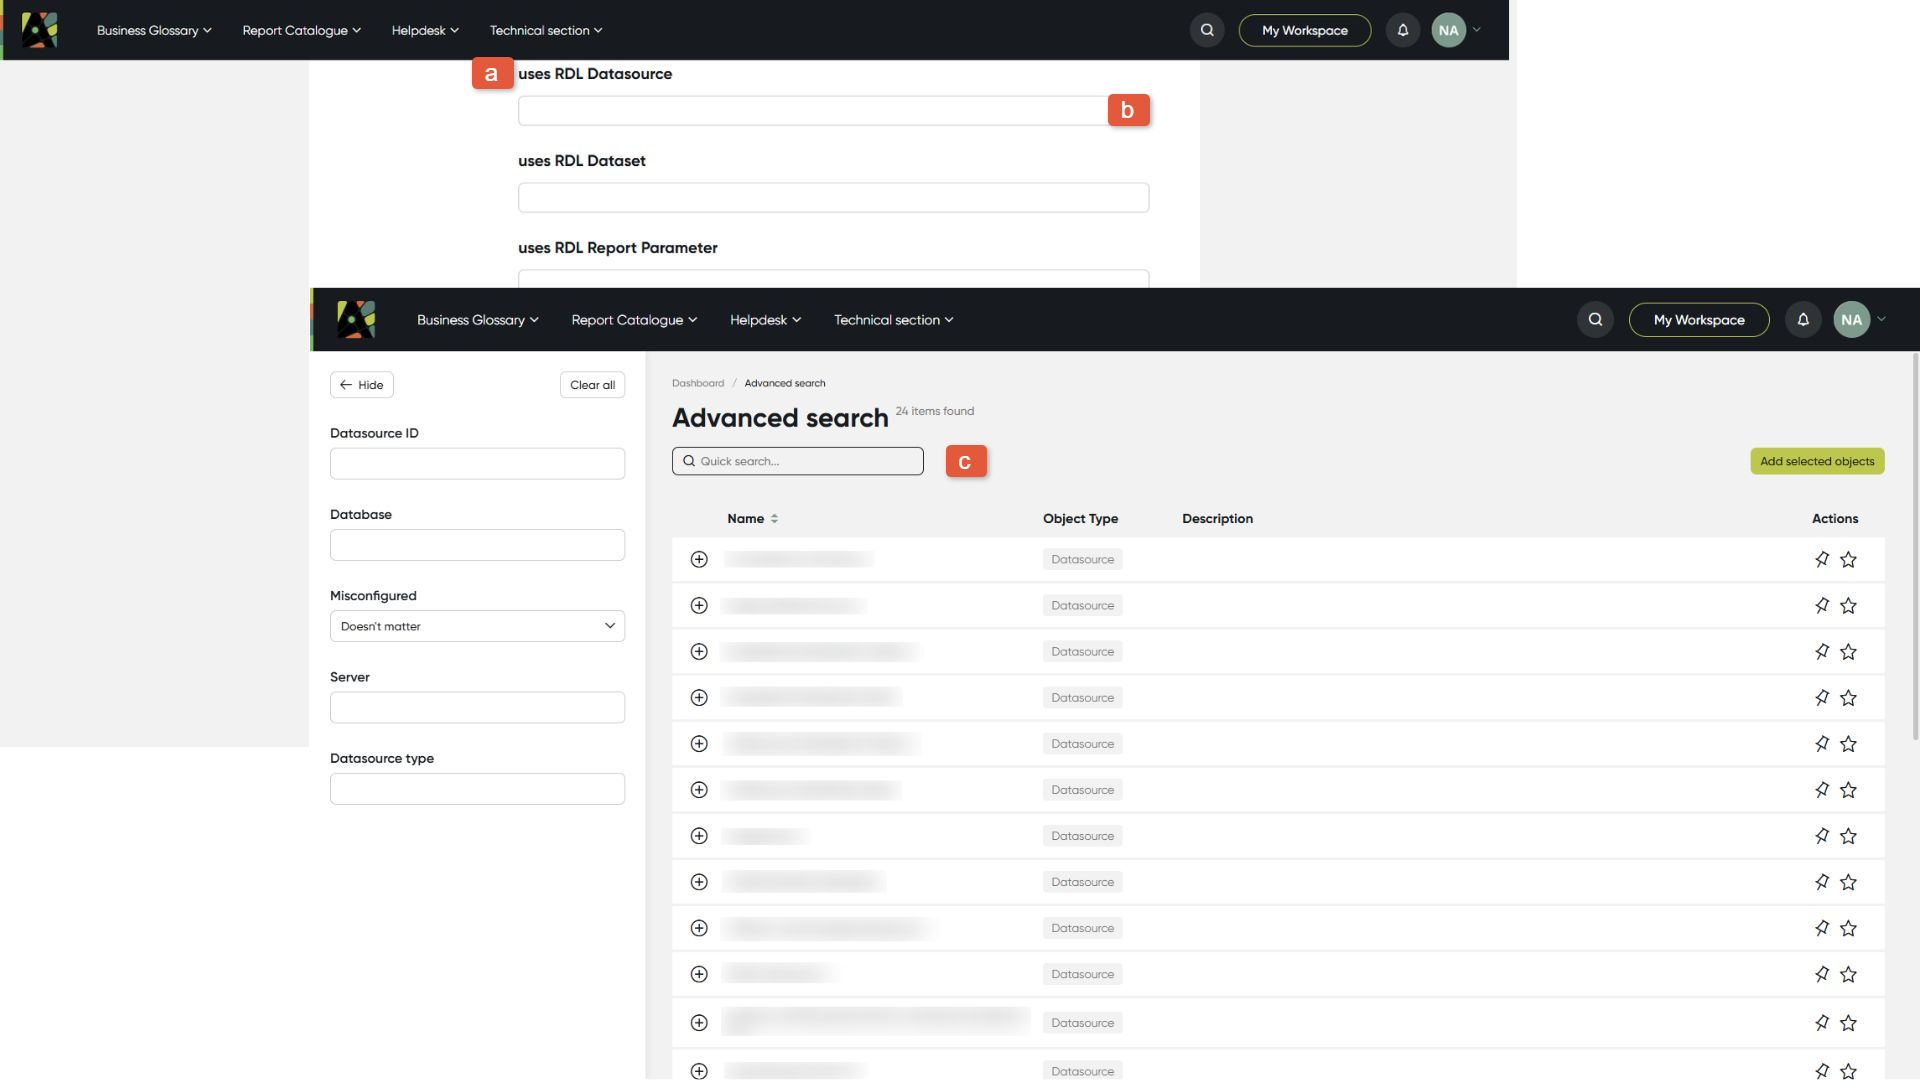
In this section define the object relations with all other objects. For this:
(a) See relation name; the related object type is always included in the relation name
(b) Click on the relation field and start typing; select the related object from the list
(c) You can use Advanced search in relation to check the list of objects of this type with all available filters.
6. Responsibilities
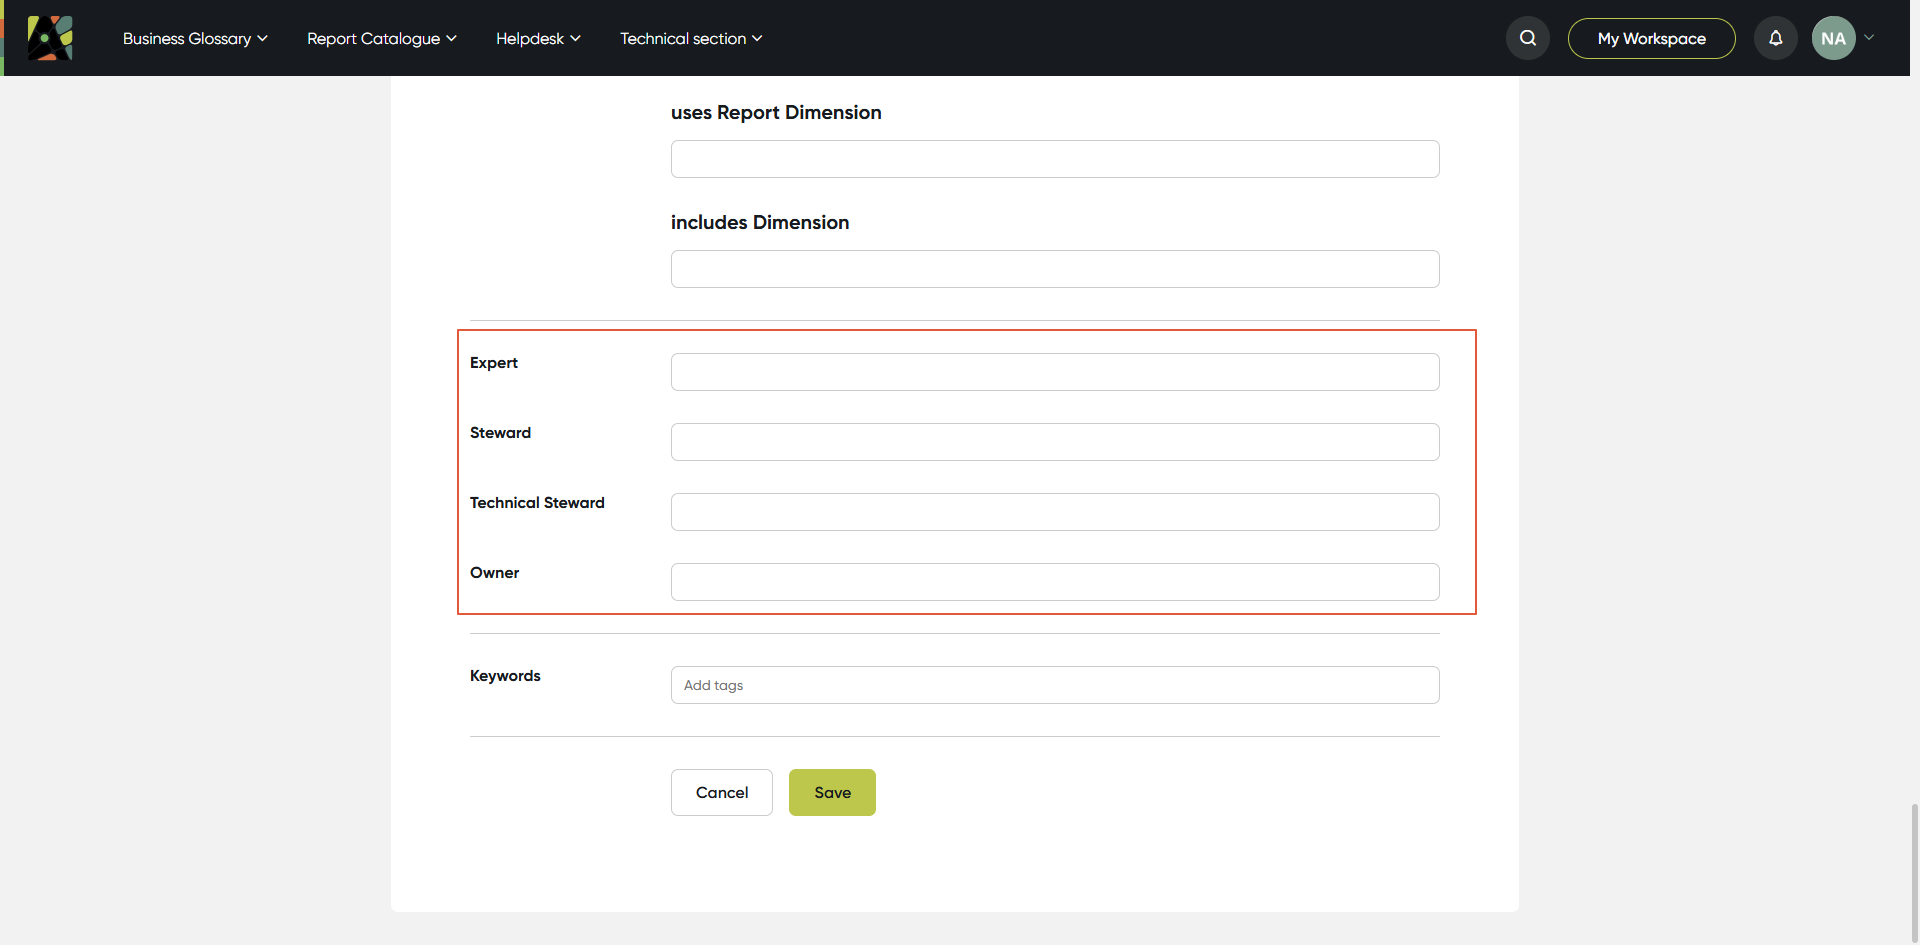
Define the people who are responsible for this particular object. There are four predefined roles: Owner, Expert, Steward and Technical Steward.
(a) Click on the field with the relevant role and start typing; select a person or a user group from the list.
Please note When you hover over a user’s name, a tooltip showing their email address appears.
7. Keywords
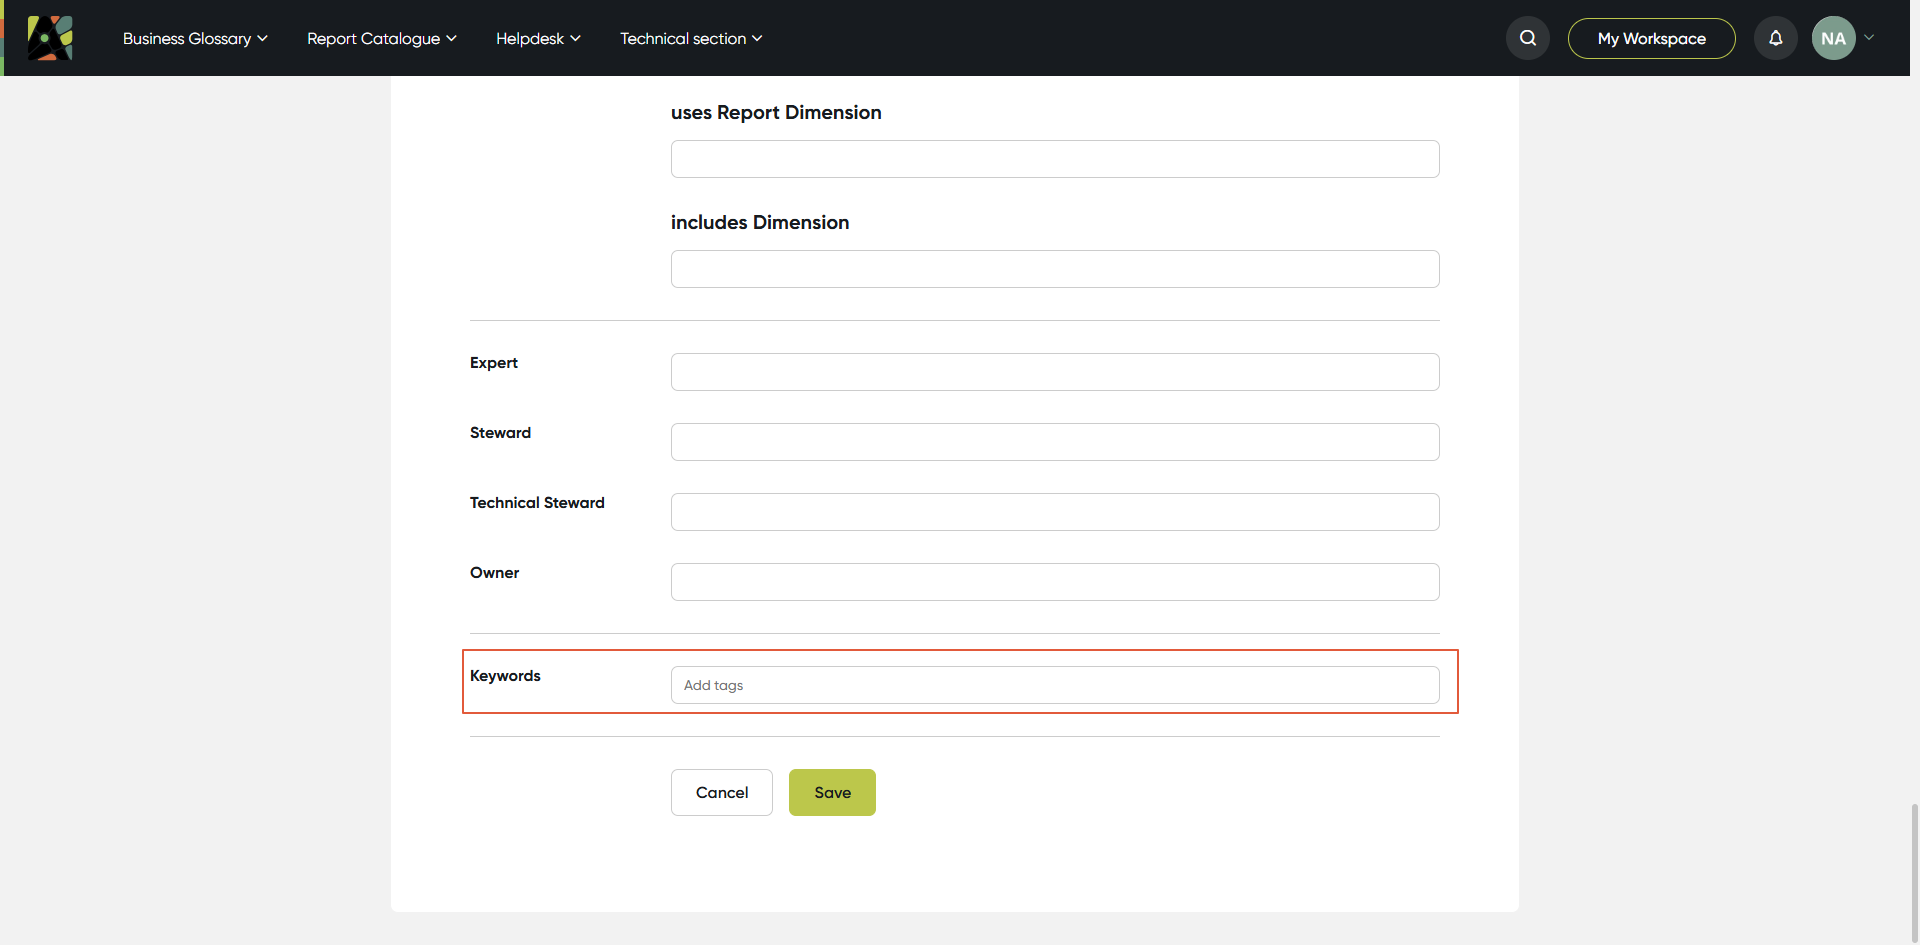
Add keywords to improve search. Keywords are created as tags
(a) Click on the field keywords; type keyword, click “enter”, then start typing the next one;
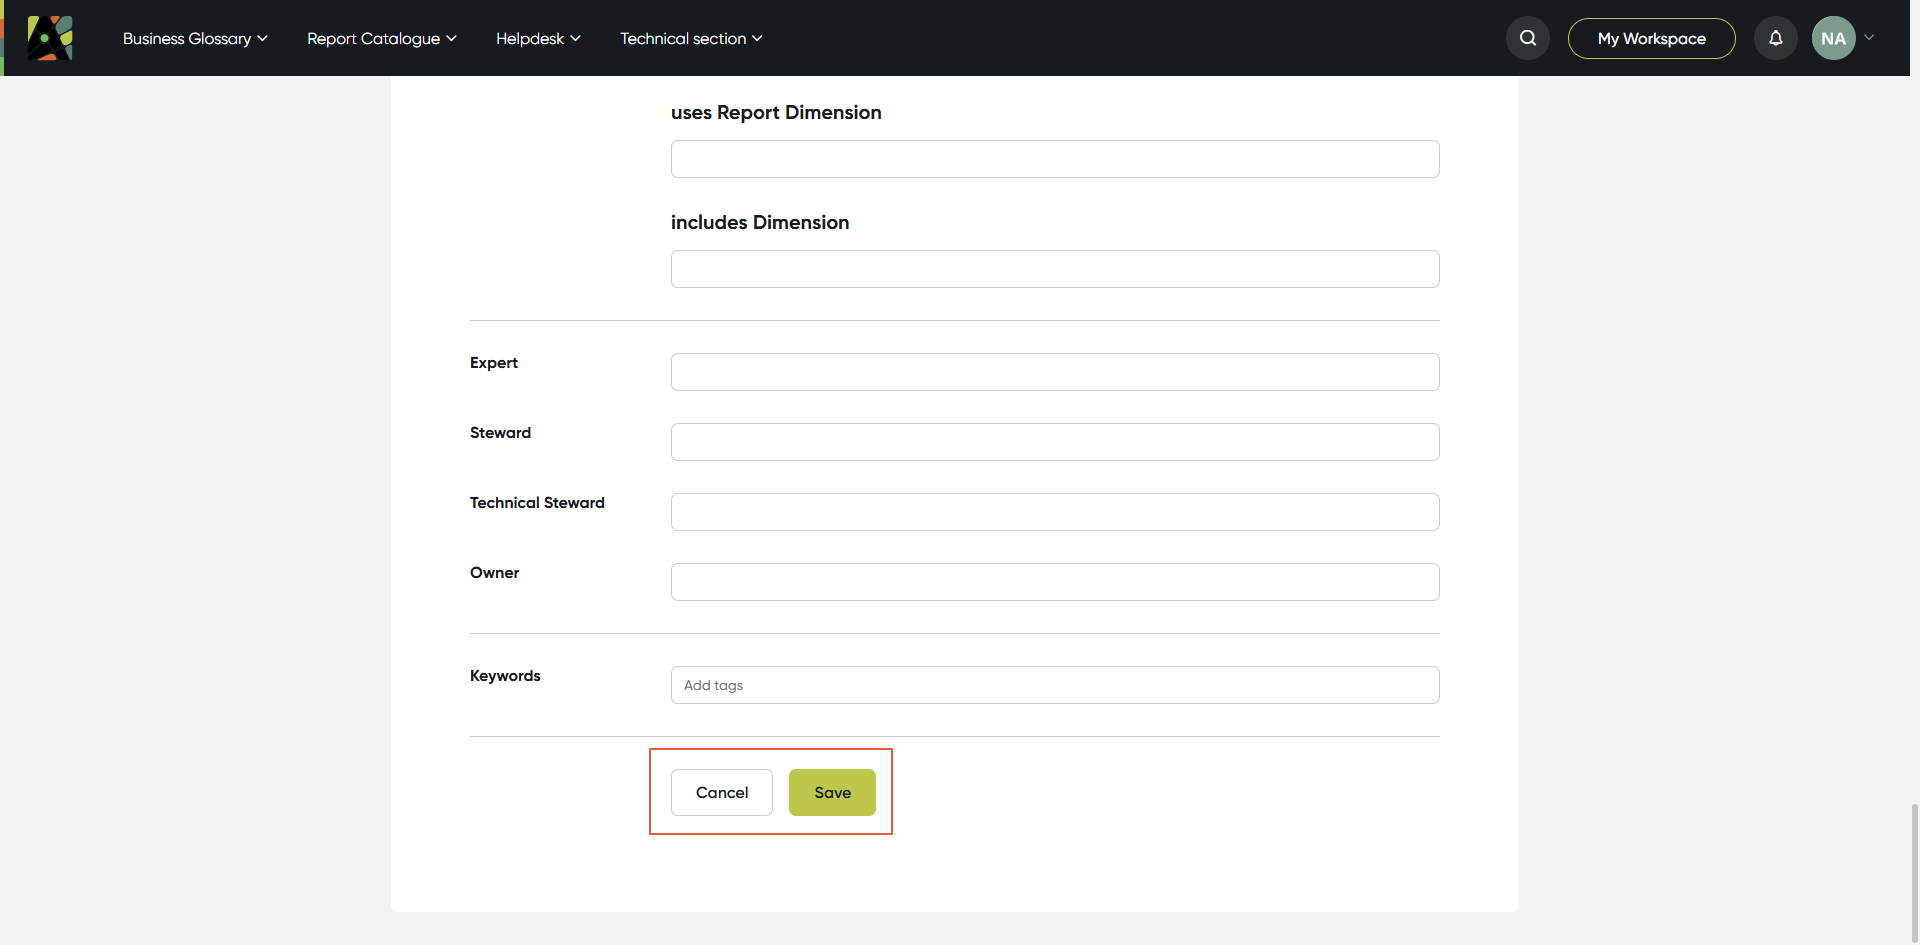
8. Save
Save the object by clicking Save button
(a) Click Save button to save changes; or cancel if you don’t want to save changes